Projects

Introduction To Relay

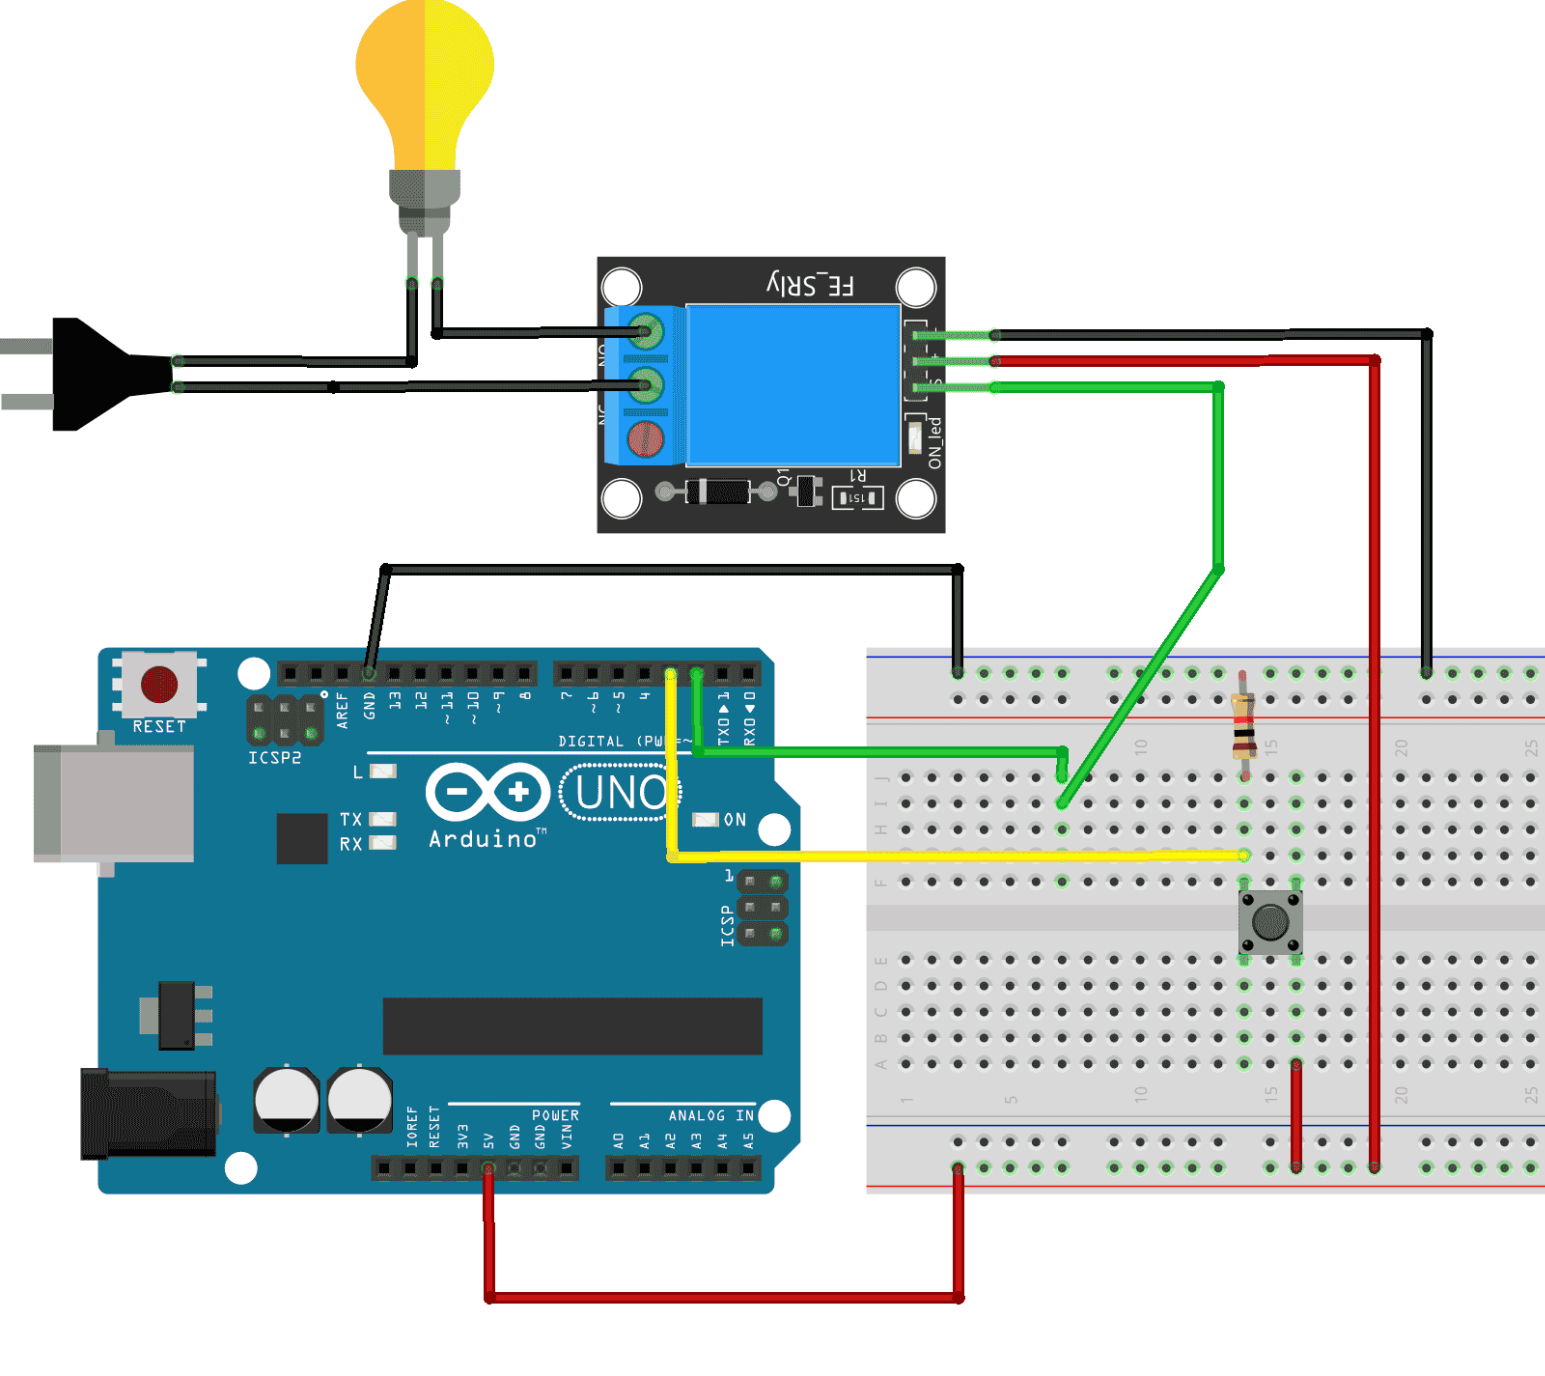
Relays are a great way to control high-voltage or high-current devices like lamps, motors, or appliances with a low-power microcontroller like an Arduino. In this post, I’ll show you how to get started with a relay, a button, and an Arduino.

Whether you're just starting out or adding a relay to your DIY automation project, this guide is perfect for beginners.


What is a Relay?

A relay is an electrically operated switch. It allows one circuit (like your Arduino) to control another circuit (like a lamp or fan) without direct electrical connection. This is useful when the controlled circuit operates at a different voltage or current level than the Arduino.

What You Need

Component Description
Arduino (Uno, Nano, etc.) Your microcontroller brain
Relay Module 1-channel 5V relay
Push Button To trigger the relay
10kΩ Resistor Used for button pull-down
Jumper Wires For connections
Breadboard for prototyping

Schematic


Wiring summary:

  • Button: Connected to pin 3, with a 10kΩ pull-down resistor (one leg to GND).

  • Relay module: IN pin to Arduino pin 2, VCC to 5V, GND to GND.

  • When button is pressed, the relay toggles its state (on/off).

const int buttonPin = 3;     // Button connected to pin 3
const int relayPin = 2;      // Relay connected to pin 2

bool relayState = false;     // Current state of the relay
bool lastButtonState = HIGH; // Previous button state
unsigned long debounceTime = 50; // Debounce time in milliseconds
unsigned long lastDebounceTime = 0;

void setup() {
  pinMode(buttonPin, INPUT_PULLUP); // Enable internal pull-up resistor
  pinMode(relayPin, OUTPUT);
  digitalWrite(relayPin, LOW);      // Start with relay OFF
}

void loop() {
  bool reading = digitalRead(buttonPin);

  // Check for button state change
  if (reading != lastButtonState) {
    lastDebounceTime = millis(); // Reset debounce timer
  }

  // If stable for debounce time, toggle the relay
  if ((millis() - lastDebounceTime) > debounceTime) {
    if (reading == LOW && lastButtonState == HIGH) {
      relayState = !relayState;
      digitalWrite(relayPin, relayState ? HIGH : LOW);
    }
  }

  lastButtonState = reading;
}

How It Works

  • The button is connected with a pull-down resistor, so it reads LOW when unpressed and HIGH when pressed.

  • When the button is pressed, the Arduino toggles the relay state.

  • Debouncing is used to prevent accidental multiple triggers from a single press.

  • The relay turns ON or OFF based on the current state.

Note: Some relay modules are active-low, meaning they activate when their input is LOW. If that’s the case, just reverse the digitalWrite logic.

✅ Applications of Relays

  • Home automation: Lights, fans, heaters

  • Industrial control: Pumps, valves, motors

  • IoT systems: Smart energy management

⚠️ Safety First

  • Relays can control high voltage AC. Always make sure you're handling high voltage wiring with care.

  • Never touch the relay terminals when it's powered.

  • If you're new to handling AC, stick to low-voltage testing, or seek help before working with mains electricity.

Leave a Reply

Your email address will not be published. Required fields are marked *